Friday, May 27, 2011

Guest Post-Banana Truffle Sundae Bites

Hello readers! Today I want to introduce you to a new blog I have recently stumbled upon. It's called Shugary Sweets and it's written by Aimee. She has a lot of great looking sweet treats on her blog and today she is here to share a new one with us. Her recipe sounds awesome and they are so adorable. Here she is....

Hey everyone, I am so honored to be guest-blogging here at Lavender Clouds! I've never been a guest on someone else's blog before, so I am truly honored and humbled that Lil invited me to share with all of you! Just a little about myself, I have been blogging my family life since 2007. I have brothers, and other family all over the world, and it's been a way for us to keep in touch (they do the same with their famiy). However, over the years, it became boring, both to write and read about my life! I mean really, how many times can you say, "well we went to another soccer game this weekend," or "kids are doing great." So in January of this year, I decided to take the plunge and start sharing recipes with my family. Through the months, I've expanded and learned that there is a whole world of food blogging! In April, I learned about linky parties- how cool are those?! Anyways, I am a stay at home mom to 4 awesome kids- my oldest, son, is finishing 8th grade this year (just like Lil's) and will be headed off to high school in the fall. Please pray for me! Then we also have 3 daughters, aged 12,9, and 7. Again, continue the prayers! They keep us very busy as they are all active in sports and church! However, I have found it's very important to strive to have family dinners together...some days it happens at 4:30pm, some days we don't eat together until 7pm. But our goal is to try every night! And what's dinner without a little dessert? Speaking of which, why don't we get to that right now! 


Here's how it started. I wanted to make a banana split dip. I realized I didn't have any strawberries. I really enjoyed making the chocolate chip cookie dough bites, so I thought I could do some sort of banana truffle. See in my family, we eat a lot of bananas. At least we normally do. I buy 3 bunches of bananas a week (about 20 bananas). There are 6 of us, so that's not so much. Except when everyone decides they don't want bananas, they want grapes. Or apples, or oranges. And the bananas sit there are lonely and neglected. I feel bad for them. So I either have to stick them in a ziploc in the freezer, make more of these, or do something new.

I chose new, and boy am I thrilled. These have an amazing center that is soft and rich (come on, it's banana and chocolate and cream). And they look cute too! Now I have to find a way to use those sad, neglected grapes that sit at the bottom of the bowl, squished and unloved. Any ideas?

Banana Truffle Sundae Bites Recipe:
1/3 cup heavy cream
1 small banana
11 oz white chocolate morsels
12 oz vanilla bark, melted
4 oz chocolate candy coating, melted
sprinkles and red hots for decoration

In small saucepan heat cream until it starts to bubble, not boil. Set aside. In food processor, add banana with white chocolate morsels. Process until combined. Slowly pour in hot cream while processing. Continue to mix until smooth. Pour into a freezer safe bowl and freeze for 2 hours (or overnight).

Line baking sheet with parchment paper. Using a tablespoon, scoop out ONE tablespoon of mixture and roll into a ball. Place on baking sheet and continue until all balls are formed. Freeze for one hour. Makes about 36 truffles.

When ready to assemble, using a toothpick dip each truffle into the melted vanilla bark. Set truffle back on parchment and repeat until all truffles have been dipped. Don’t worry about the toothpick hole, it will be covered by chocolate. They should set within minutes because the truffle was cold. Melt chocolate candy coating and pour into a ziploc bag. Snip small hole in corner of bag and drizzle a little blob of chocolate on top of each truffle. Add sprinkles and red hot. The weight of the sprinkles should make the chocolate drizzle down the sides a bit. Otherwise use a little more chocolate with the next truffle. Allow to set in refrigerator and enjoy cold!

Thursday, May 26, 2011

Major Problems With Google Blogger and GFC

Hello Folks! Just a quick update to let you know my blog is slowly but surely becoming more screwed up by the day. I swear I didn't even change anything today! My GFC followers have disappeared. My dashboard still shows I have 102 followers, but I can't actually see any of their pictures. So...I don't even know if these post will still show up in your Dashboard Reader for you.

Separately, I have not been able to comment on anyone else's blog posts either. I write my comment, type in the security word, and it redirects me to my login page. I login, same as always and it takes me back to the comment page and asks me to type in a different security code only to redirect me back to my login page, over and over. So please know, I'm here, I'm reading your posts, I'm just stuck :(

I hope I can get it fixed soon, because I'm supposed to have a guest blogger tomorrow and I want you all to be able to read her post. If you are a GFC follower and receive this in your Reader, please let me know that it is working by leaving a comment below.
signature2

Williams and Sonoma Brooksters ***Fail***


I recently purchased a box of Brooksters from a retail Williams and Sonoma store. They are not available online. I decided to purchase these because I figured they would be easier than making them from scratch, which I have done before. It was $16 for a box that contains packages for two separate batches of 9 Brooksters, giving you a total of 18 Brooksters.
The directions state all you have to add is butter and eggs. I opened my box and followed the first part of the directions to make the cookie dough. I wrapped it and put it in the fridge. Next, I went to make the brownie part of the recipe. It was at that moment I had to re-read the ingredient list and directions over and over to make sure I was reading it correctly before I called Williams and Sonoma to complain of missing ingredients. That's when I snapped this photo.That's right, my box of Brooksters did not come with all the ingredients. It was missing two packets of chocolate chips that are melted and used in the brownie mix.
I called Williams and Sonoma Retail Customer Service at 866-224-4598. She was unable to help me but connected me to my store's manager even though it was only 9 am, an hour before my store opened. While the woman at the main customer service was very nice, I have to say that Amy, the store manager, was not. She seemed very inconvenienced to have to help me. Her first suggestion was that I bring it back and exchange it. I declined because I was literally in my apron making the darn things! I also noted that her store is a good 35 minutes from my house. I asked her if she could open a box and check the ingredients. She said no, and asked me to further explain the problem. When I did she said it was a misprint on the box. I again explained that it was not a misprint in the instructions, it had to do with the ingredients provided. She agreed to open a box and informed me that, yes, I was missing two packets of chocolate chips. I told her I had some mini chocolate chips. Could she measure the chips for me so I could use what I had? Clearly she was annoyed and put me hold to come back with a weight measurement of three ounces. I asked if she could instead measure them in a cup because I didn't have a scale. Even more annoyed she came back and said it was 1/3 of a cup. I told her thank you and she said you're welcome and hung up. I am extremely disappointed with her poor customer service.

I used my chocolate chips and finished the recipe. I baked as directed. Unfortunately, there is difficulty with getting the brownie completely cooked without compromising the cookie. My brownies were undercooked slightly and upon removing them, they just completely separated from the cookie. Also my batch only made 7 Brooksters despite adding exactly 2 tbls. of brownie batter to each muffin cup as directed, which is why I'm confused that mine turned out a lot thicker than the ones shown on the box. The flavors of these Brooksters were lacking. I will NEVER make or purchase these again and next time I'm at my mall, I will return the box and insist on a full refund.
Brookies or Brooksters do seem like they could be really delicious, and they can be, but I would suggest making them from scratch. I've used this Matt Lewis recipe with decent results. The flavor of these Brookies featured on the Martha Stewart show are absolutely perfect, but they are a lot of work and results of the finished product vary. There is even a video. Good luck!
signature2

Monday, May 23, 2011

How I Taught My Child Multiplication

Chloe entered third grade this last fall and I knew this was the year they would start learning multiplication. I wanted her to know her multiplication tables before they started learning them in class for a couple of reasons. One, I wanted whatever she learned at school to be extra practice and two, I thought if the tricks I taught her didn't work, she would surely learn different ones at school. When Nash was in third grade he attended an amazing charter school. I remember that his teacher used stories and pictures to help the kids remember the facts. I had no idea what lesson she used, so I began Googling.

I purchased the book, Multiplication In A Flash.
It's actually on sale right now for $21.95.  

The book starts with several schedules. You can choose one to fit your needs and desired pace. I picked the 3 day schedule. When it was time, Chloe and I would sit down at the table with a white board, our printouts, and some m&m's for motivation! I would talk her through the short lesson and whatever else.  I used the whiteboard during the lesson, then she got to use it, to show me what I just explained. The book walks you through everything and it is VERY EASY to follow.

The best part about the book is that it has different teaching approaches for each kind of learner. It teaches with funny stories that are easy to remember, pictures that tell the story, games, and cookie graphs.

Here are a few snapshots from the book:


Teacher Gift Idea
See the eight and skate picture below? I printed that and all the others like it off onto white cardstock. I printed the story that goes with it on the back. Then, I had Chloe color the photo. We did this on a few cards each week. When they were all done and we completed the book, I had them lamenated. We gave the cards and the book to Chloe's teacher.


At times, we struggled to start the lessons, but we got through it. The m&m's helped. So did the bribe. I promised Chloe that after she was done with the lessons, I would get her the Marbleworks toy from Discovery Toys. I'm so happy I took the time to do this with her. It definitely gave her an edge. She never had any trouble when she did multiplication in class. In fact, she was the best in the class, scoring 100% on every timed test before any of the other children. Aren't those bragging mom's so annoying?

*I was not asked to write a review for this product, nor did I receive any compensation.
I'm just sharing something with you that I really loved!
signature2

Saturday, May 21, 2011

Caramel Apple Cupcakes


In my Teacher Appreciation Week post I mentioned that I was going to make these caramel apple cupcakes I found on Tidy Mom's blog. Have you been to her blog? You'll love it I'm sure. Well, I made them and they were more than amazing. Her Cinnamon Buttercream is the best buttercream I've ever had. And I'm not a fan of buttercream at all. I dropped some off at Nash's school in the morning and by noon the secretary was calling. I immediately got worried something was wrong with Nash, but she said she wanted to place a cupcake order for an upcoming baby shower. She is the best kind of customer. You know, the kind that says, do what ever you want, be creative. Honestly, I really do love those customers. Then if you screw something up they'll never know that's not what you had planned!

On to the recipe. You start with a box of Duncan Hines Decadent Caramel Apple Cake mix.

Simply follow the instructions for cupcakes on the back of the box.

*Note: The instructions call for mixing the caramel and spooning it on top of the cupcake batter and then swirling it with a knife. I had trouble with this step. Next time, I think I will add the caramel mixture to a piping bag and use a small tip to pipe it in little swirls. It was difficult to spread it with the knife because it's so thick and it ended up being kind of clumpy.

Next, click here for Tidy Mom's Cinammon Buttercream recipe. It's basically regular buttercream with the addition of cinamonn and some vanilla bean paste, which I found at a gourmet market and I loved. I have never used it before, but I will use it often. She also uses cream instead of milk. She adds corn syrup to the frosting, but I inadvertently left it out and it was fine. I'm not sure why she added it, but maybe it was to make the frosting more manageable. I bet you could use piping gel for the same purpose.

I purchased these adorable glasses from Starbucks the same day I made these cupcakes, so I thought I would use them as props!
I love taking pictures of cupcakes.
The sit still, they don't make funny faces, and they have an endless amount of patience.
Thanks for a great recipe Tidy Mom, it's a keeper!
signature2

Friday, May 20, 2011

My Closet Makeover

I took my own advice yesterday and cleaned out my closet. It was truly therapeutic. I realized I'm was a clothes hoarder. Don't get me wrong, I clean out my closet regularly. At least twice a year. But....I also shop a lot, and my weight fluctuates a lot. Who new that an extra 10 lbs would disagree with so many of my outfits? Apparently not me, or maybe I really just couldn't let go. Maybe I just knew, soon enough I was losing that 10 lbs and I'd be right back in those clothes. You wouldn't believe how many size 2 pants I found in there. Really, size 2? That's not happening anytime soon, if ever!

They say if you haven't worn it in 6 months you should get rid of it. I disagree and say at least a year so you can get through  and back to the season. Anyway, I didn't take any before pictures, it was too dangerous. Here's how I tackled it. I tried on anything questionable, I separated into a few piles. Garage sale, not mine, and consignment.
 Here is the garage sale pile:
Here is the consignment pile:
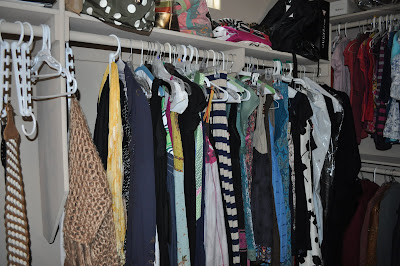
Here is the less cluttered final product:
I have organized my closet like this for as long as I can remember. Items are grouped together such as shirts, dresses, jackets, skirts, pants/jeans. Then those groups are organized by color for shirts, size for pants, length for skirts, weight for jackets, and formality for dresses. It may seem crazy or complicated, I didn't really sit down with a plan, it just kind of ended up like that over the years.
Black shirts and jeans:
 Dresses:
I feel better :)
signature2

Thursday, May 19, 2011

Is It Too Early For A Drink?

I am feeling so frustrated. It all started yesterday when I made yet another attempt to add a cute font for my post titles and sidebar. I've followed Amanda's tutorial many times, only to give up the same number of times. Yesterday I found this awesome video tutorial at The Blog Designer Network that walked me through each step. When I was done with all the steps it even sort of worked. The cute font was there but my old title was also still there. I followed Amanda's troubleshooting tips and instead of fixing it, I made it disappear and after many more hours and attempts I gave up again. Nash tried to make me feel better, but at that point it was that I just needed to accomplish it for the sake of accomplishing it. I have done pretty much everything on my blog by myself, and I just can't bring myself to have someone else do this for me. It's the stubborn principle of it all.

On top of that mess, I was in workout clothes all day yesterday and never worked out, I cooked two different things that didn't turn out to my satisfaction and I'm trying to make a life changing decision for my family. Being a grown-up can be hard. When I was little, all I wanted to be was a grown-up. My imaginary play was usually me taking my kids to a fro school and going to the grocery store. I have to say my imaginary world was not a stretch from my current reality. But in my childhood play I never had to deal with dilemmas. I was never faced with decisions that would impact my family. As a mother and wife, that's all I do. Every decision I make will effect my family and that can weigh heavily. I wish I could see into the future. I wish I knew what the best place for Nash will be for his high school life. I wish hubby wasn't so indecisive.

So, I'm frustrated because time is getting the best of me and there are too many loose ends. I think it is too early for a drink, even if it were a mimosa. I think instead I will clean out my closet and rid myself of excess material baggage. At least I will feel some sense of accomplishment. Making decisions about what tops and sundresses to giveaway should be a lot easier than tackling CSS codes and life changing decisions.
signature2

Tuesday, May 17, 2011

Puffy Oven German Dutch Pancake Baby! Recipe and {Personal Reflection}

I really wanted to post a prosciutto panini I make because it's rainy and cold here in not so sunny SoCal and soup and hot sandwiches seem perfect for tonight's dinner. But...I can't find the pictures I took last time I made it. I'll keep looking for next week, but in the meantime I leave you with this. Perhaps you've seen it before. It goes by many names, Dutch Baby, German Pancake,  or Oven Pancake.

I've been making this for my family for years, it's soo easy and such a treat. I began making this because when I was little I spent the summers with my aunt and uncle. Every Friday night, my aunt would gather all of us kids and take us to the Mission Valley Marriott. They had a live Calypso band that played out at the patio by the pool. We spent hours dancing the night away and sipping our virgin margarita's {we thought we were so cool}. After the night of dancing she would take us to Ricky's Restaurant. She'd order a couple of these pancakes for us to share. Isn't she the coolest aunt ever? She literally took us every Friday. She is pretty big on traditions and making awesome memories for kids. She is largely responsible for so many of my happy childhood memories. I try to instill the importance of these traditions in my own kids, but I'm not that good at it. Luckily, she lives down the street and is a big part of my kids life, so I can leave it to her for now :)
Photo Source

Dutch Baby, Puffy Pancake, German Pancake

Ingredients:
2
 tablespoons butter or margarine
2
 eggs
1/2
 cup all-purpose flour
1/2
 cup milk
1/4
 teaspoon salt
2
 cups assorted fruit, diced
1  lemon, rinsed and cut in wedges
Powdered sugar and maple syrup, if desired
Instructions:
  1. Heat oven to 400°F. In 9-inch glass pie plate, melt butter in oven; brush butter over bottom and side of pie plate.
  2. In medium bowl, beat eggs slightly with wire whisk or hand beater. Beat in flour, milk and salt just until mixed (do not overbeat). Pour into pie plate.
  3. Bake 25 to 30 minutes or until puffy and deep golden brown. Serve pancake immediately topped with berries. Sprinkle with powdered sugar, lemon juice and syrup.
Makes 4 servings
signature2

Monday, May 16, 2011

Another Weekend For The Record Books {Personal Reflection}

Well, there weren't actually any records set this weekend, but it was a weekend worth recording. We've had three great weekends in row this much which is saying a lot. There have been weekends where we just can't figure out something fun to do for the life of us? Does that ever happen to you? Besides hubs and I's {wait, is I's correct grammer, doubtful} permanent standing date-night, it helps that Chloe has games on Saturday's because that is a pre-set family activity that gets us outside and we all thoroughly enjoy watching her play. This Saturday after Chloe's game me and the kids went to lunch with my Aunt and my cousin. Remember the one that I hadn't spoken to in a long time and we recently re-connected? Yep, we all went to lunch and it was sooooo nice. Perfect actually. I'm glad she was available to go, it was great to spend time with her in that setting. She also was rooting Chloe on at her game. Chloe received her second game ball. She had an incredible hit that was almost out of the field. She also made a few outs at first.

After lunch we went home for siesta. Then, that evening, Chloe had a friend sleep over, which these days is a rare occasion. The little girl had never been over before, but she was so sweet and easy! Chloe was very happy. Sunday morning her friend was picked up shortly after breakfast. Later, we took the kids to Belmont Park. Belmont Park is small amusement park, with maybe 12 rides, located right by the bay/ocean in San Diego. For $27 per child they get a bracelet that allows them to ride all the rides as many times as they want. It's a great deal. It's also great that Chloe and Nash are big enough to go on all the rides by themselves. Me and hubs just got to watch, although my stomach drops just seeing them on the rides like this very old roller coaster.
Giant Dipper at Belmont Park San Diego, CA.
Giant Dipper @ Belmont Park, San Diego, Ca.
Photo from Joyrides.com
signature2

Friday, May 13, 2011

Seashell Cupcakes & Candy Mold Tutorial

 
Last week I made these cupcakes for a lady who was having a seashell themed bridal shower. These were pretty easy to make, but they look really impressive. Painting the candy is a bit tedious and time-consuming but I felt it to be quite relaxing. I purchased my supplies from my local cake decorating shop. They have a large variety of molds and chocolate. I skipped Michael's for this project, but they may have some supplies too.
How to Make and Paint Candy From Molds
Supplies:
1 lb. good quality tempered chocolate {I used Merckens}
Plastic Candy Molds
Luster Dust
Paint Brushes
Gloves


There are two ways to melt your chocolate. You can use a double boiler or you can use the microwave. I chose the microwave method because I think it's easier. Also if you use the double boiler method and get water or steam in your chocolate can streak or harden. So, grab a large glass microwave safe bowl or measuring cup. For 1 pound of chocolate you only need to melt it for 1-minute on full power. I did it at half power and stirred at 30 second intervals. Even if the chocolate isn't completely melted stir it, it will melt as you stir it together.  Total melting time should not exceed 2-3 minutes.

Chocolate will melt at about 100 degrees. If you heat it over 125 degrees, it will return to a solid mass. Also if it cools too much it will have whitish streaks when molded. If this happens just re-melt the chocolate and mold again.

Chocolate molds should be clean and dry. Never put water, oil, cooking spray, or cornstarch in the molds when using them for chocolates. Never put them in the dishwasher, just use dish soap and hot water to clean them.

When molding, it's better to UNDER FILL molds. Over-filling causes feet to form on the chocolate. Simply use a spoon to carefully fill the mold. Always work in a cool room. Ideal temperature is 62-65 degrees. The cooler the room, the more shine they will have.
This is what they will look like before you tap them.
 Now, gently tap them on the counter and they look like this:
Once you have filled your molds, chill in the refrigerator for 10-15 minutes, or freeze for 5-7 minutes. After they're chilled they should have a "frosty" appearance. If they still look shiny, they should be chilled a few minutes longer.

To unmold, simple turn over and tap them out over a cookie sheet. You may have to bend them a little like you would an ice cube tray then just tap your finger over the chocolate to release it.
Working in your cool room, wearing latex like gloves, dip your brush into your luster dust. You DO NOT need water. You just paint or dust your candies. You can use a single color or apply coats in different colors. You should end up with something like this:


signature2

Wednesday, May 11, 2011

Bear & Baseball Cupcakes & How To Add Filling to Cupcakes


I made these cupcakes yesterday and donated them to our Little League snack bar for them to sell. I was pretty happy with how they turned out and they were pretty simple to create. I had some leftover icing from the Bridal Shower cupcake order I had over the weekend so I just used that. I used Funfetti cake mix and filled them {using a 12 tip} with Marshmallow Creme. I made these little baseball toppers from white chocolate, a candy mold, and a red food writer pen. I promise I will get the candy mold tutorial up this week.


For the Sunbathing Bear Cupcakes I used a Wilton 107 tip for the waves, graham cracker crumbs for the sand, sour candy strips for the towel, a gummy bear, and the umbrella. I pasted the towel on with a dollop of icing and I wet the bottom of the gummy bear and placed him of the towel. You could obviously use Teddy Graham's too if you prefer.

Here is a simple photo tutorial for how to fill cupcakes. I don't bother scooping out any of the cake. I have found that to be an unnecessary step. I've filled cupcakes with jam, icing, and marshmallow creme and I've never had any problems doing it this way.
Slowly begin to apply pressure to your piping bag. As soon as you see your cupcakes begin to plump it's time to stop. Release pressure from the bag and remove from cupcake.You can use a small spatula, spoon or butter knife to scrape off the excess on top shown in step 3. 

signature2